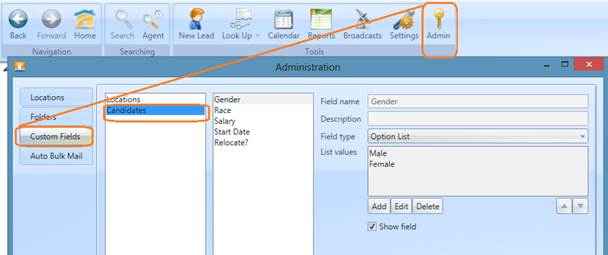
Step
One: Begin on the
upper navigation bar. Click the “Admin” button and click on the “Custom Fields”
Tab. In the first column, highlight the candidate list, to access fields for
the candidate entity.
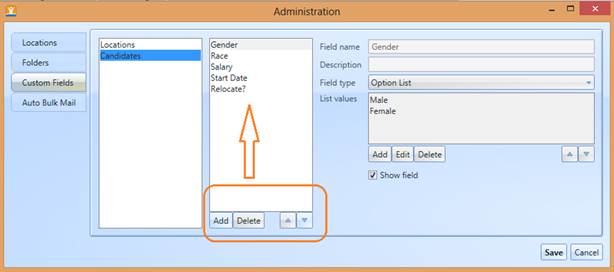
Step
Two: From this
section of the application, you can adjust the order of the detail fields for
the candidate using the arrows. You can also add, or delete a field. Finally,
you can opt to edit the name of an existing field.
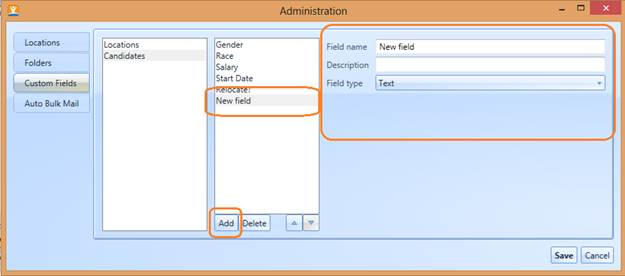
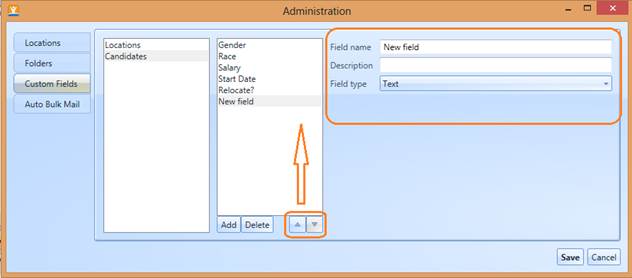
Step
Three: To create a
new field for the candidate detail, click “add” then view the field name,
description and type fields. From here you can create the name of the field and
select the type of field you want.
Step
Four: When you
have created your new field, you can adjust the order of the new field in the
list using the arrows beside “add” and “delete” or save, to add the field to
the detail field.
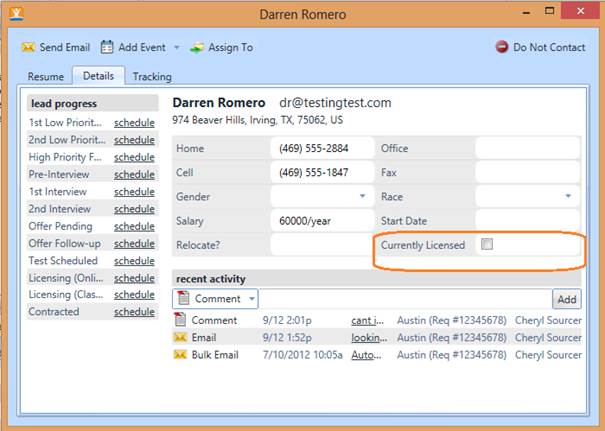
Step
Five: To edit an
existing field, highlight the field from the detail field list, and edit it in
the Field name field. Primary fields like Race, Gender, Start Date and Salary
cannot be edited.
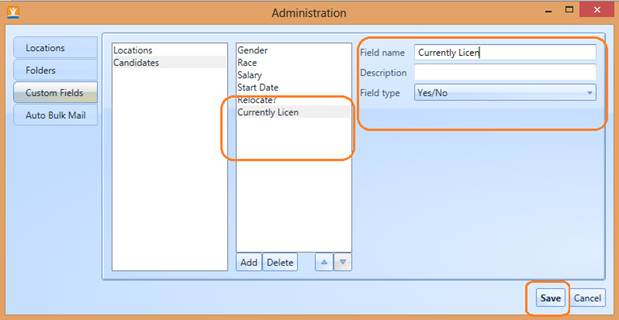
Step
Six: Click ‘save’
when you are done to preserve your changes, then review the candidate detail
pane to view your new field.