Step
One: Creating a
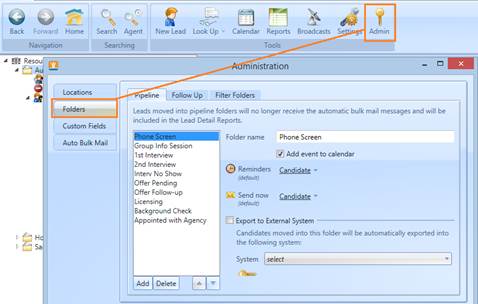
new folder and adding it to your org tree is a two part process. Begin by accessing
the folders tab. Click the Admin button, then the folder tab button from the
tabbed list.
Step
Two: Select which
folder type you want to add you’ll be choosing from the first two tabs in the
list. Here are some important things you’ll need to make note of:
·
Pipeline
folders are for
candidates you have already contacted. By default, these folders automatically
stop your auto-bulk email campaign when a candidate is migrated to them. Add a
folder here only if you DO NOT want the candidates to still receive auto bulk
emails about job openings.
·
Follow Up
folders are for
leads, or people you are still attempting to connect with. Add a folder here
only if you DO want the lead to receive auto bulk emails about job openings.

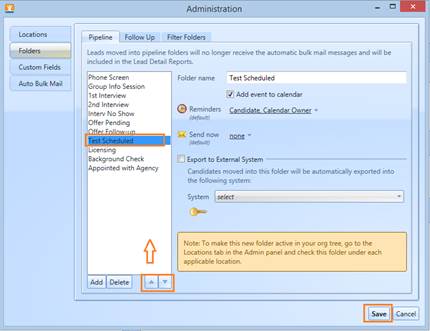
Step
Three: Select your
folder type by clicking the tab name, then click “add” to create a new folder. You
will see a prompt reminding you of an additional step you’ll need to take to
have your new folder visible in the tree.
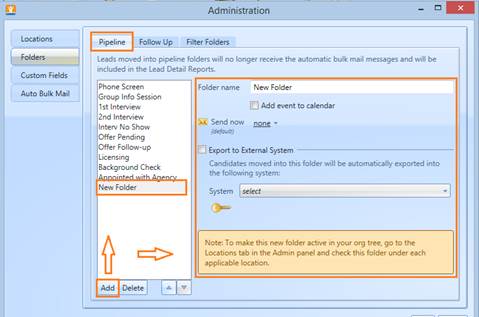
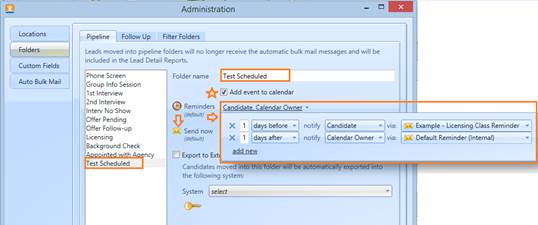
Step
Four: Name your
new folder and establish its settings.
·
Indicate if
you’d like any event on your calendar associated with this folder status. This
is usually only important for scheduled events like interviews and meetings.
·
If you opt for
the folder to add an event, you will be prompted to set the common reminders
you would want associated with that event. This is not required, but can help
further automate some steps for you as you schedule events. When using this
setting, anytime you schedule someone into this new folder, the default
reminders you build here will automatically populate in the scheduler window.
·
Indicate if
you’d like the folder status to prompt an immediate email to be sent to the
candidate, you can set the folder to send an immediate email after the
scheduling action is completed, by using the “Send Now” list, beneath your
reminders.
Step
Five: Move your
folder to the desired place in the folder list by using the directional arrows
beneath your folder list. Click save when you are done.
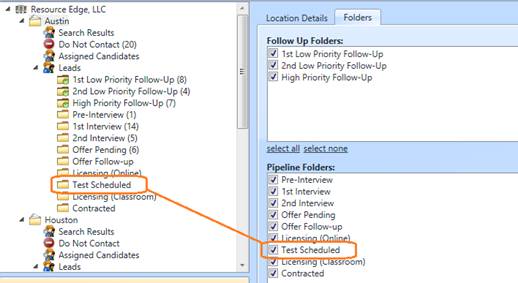
Step
Six: Next, “activate”
the new folder in each location you want to reflect the new folder. Go to a
location in the org tree and view the location details by clicking on the
location name. Click the “folders” tab to view the folder list for this
location.
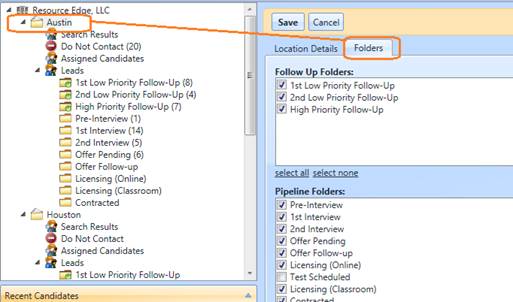
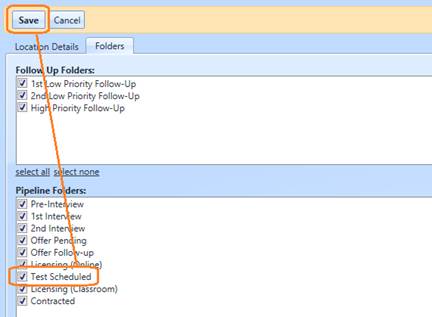
Step
Seven: Click the
check box beside your new folder to “activate it” for this location, then click
save to preserve your change. Repeat this action for each location in the tree
that should reflect your new folder.