Step One: Select the Auto Bulk Mail tab from the Admin button. Begin on the Admin button on the upper navigation bar. Click Auto Bulk Mail on the tab list. Click your location from the location list in the middle column.

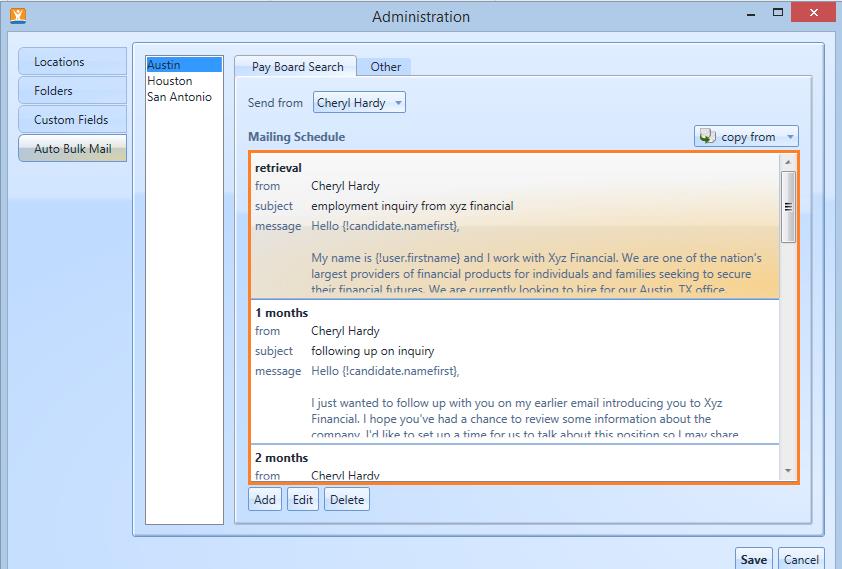
Step Two: Review your campaign mailing schedule. Auto Bulk Mail campaigns are broken into two category types: Pay Board Search (for pay board search results) and Other (for search results pulled from other categories). You’ll be working mostly with auto bulk emails for your pay board searches so that’s where we will focus for set up. Your system will contain either sample templates we installed to get you started, or the emails you’ve indicated you’ve used in your previous campaigns. Please follow along with these steps, to learn how to edit these emails.

Step Three: To edit the campaign we built for you, simply click on the email in the list, and click edit. If you have emails provided by your company pre-installed in your product: do not make any changes to your emails without approval from the department in your company that manages your email compliance. If you have the starter templates we’ve built in your system for you: please go through each email and update it with your specific details where indicated.
In each template, check for Bolded Content – which needs to be personalized for your business. For example, in your first email template, you have a few bolded instances of content that need to be updated specifically for your company and location. Let’s use the “retrieval” email as an example of what to look for and edit.
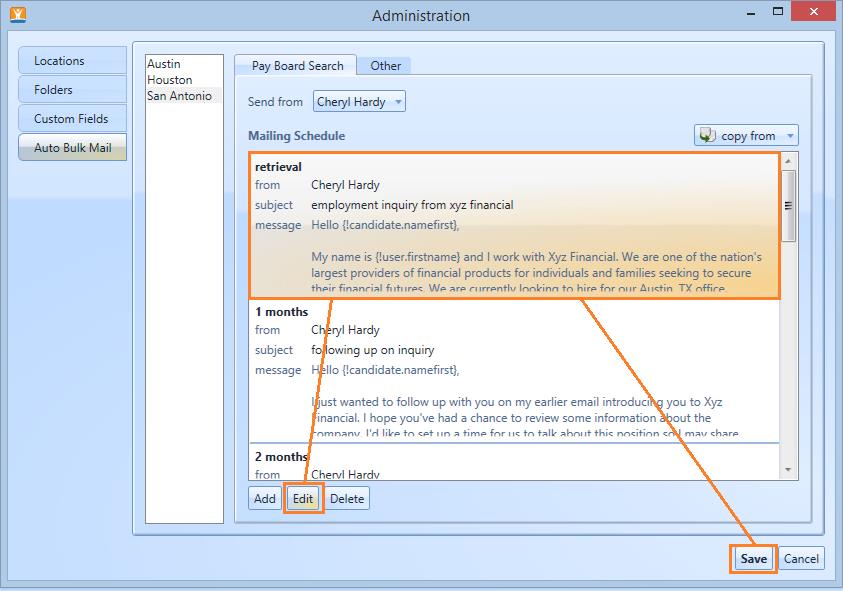
Click the “retrieval” email from your payboard search and click the edit button:

Use this time to read the content and see if you want to change the content further so it reflects your company communications style when recruiting. Also, consider adding content that “sells” your company to a prospect. What makes you a great company to work for? When you finish working on the template, click Save to preserve your changes.
Step Four: Use your email template macros to save time and personalize your content for each recipient. As reviewed in the training video, your macros – located under the “insert” drop down, give you a quick way to embed information into the body of your email. They are broken out into macros for your candidates, you and the location you are recruiting for. When you insert a macro, the system recognizes what information you want pulled from your candidate, you or your location information and inserts it automatically, each time an email sends.

When you have all of your emails updated for your locations, click save at the bottom of bulk email library, to preserve your pre-built campaigns to reflect all of your emails for your business.
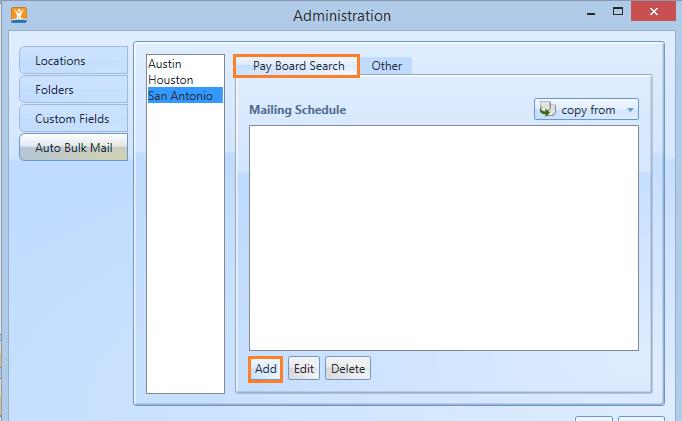
Step Five: If you have multiple locations built in your tree, your next step will be to build a bulk email campaign for them as well. Be sure you’re on the pay board tab and click the proper location from the location list you want to build your next campaign for.
You have two ways to create content for an email campaign, once you already have your first campaign built. The first way saves time and is very quick. Note the “copy from” button beside the Mailing Schedule content section.

“Copy from” gives you the option to choose an existing campaign currently in the system for one of your other locations. In one click, you have a full library of emails for that location. When using this feature, we sure to take into consideration the following questions: Is there job specific content that needs to change for this location? Are there any special information I need to add for this location and job? We recommend you review each email to make any changes to personalize the campaign for this location.

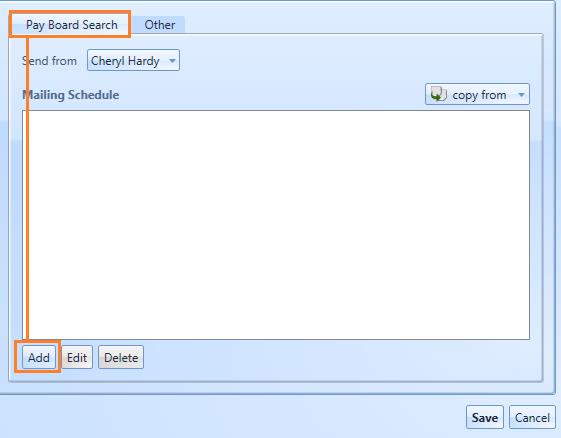
The other option for a new email campaign is the manual method, where you compose each email for the eight contact points in your campaign. Click “Add” to launch the email builder for your additional location.
After clicking add, you will see a pop up with tips on writing good content:

Take a few moments to review these tips - then proceed by clicking the “OK” button at the bottom of the window. For best results, you’ll want to create an email for each contact point listed in the schedule. This will reach the prospect 8 times over the course of a full year to initiate interest in your company and jobs. For a complete campaign, you will need to create 8 individual emails so your campaign doesn’t seem automated to the recipient.
Click “add” to create the first email.
Select your first email – “retrieval” by clicking the check box in the schedule section. Then select who the sender of this campaign should be – you, or a license holder within your organization.

Step Six: Review the “Avoid the spam folder” section of the interface. On the far right column, you’ll note the “Avoid the spam folder” warning section. At the top, the field in white will populate with warnings for any content you create that could potentially flag your email as spam for the recipient. As you create your content, watch this area for any corrections you may want to make to your copy. The two help buttons (light bulbs) beneath the flagged section include helpful information you may want to refer to so you understand the key points to ensure your email campaign is as spam free as possible.

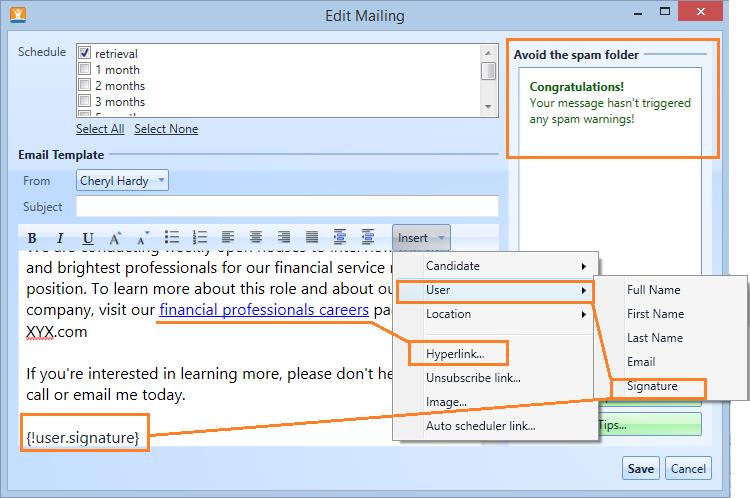
Step Seven: Get familiar with the macros. In your email, you can embed macros in places where you would place information personalized to the candidate: things like their name, their location and the source where you located their resume. You can also embed macros for your personal information and contact details. To use these macros, click the insert drop down and review the candidate, user and location macros. Selecting a macro will put a placeholder in the email body where you want personalized content to appear. In the example, we’ll place a candidate name macro at the beginning of our message, so the email addresses the candidate directly.

Step Eight: Write your email. Create a short subject line where indicated. Then write, or cut and paste your first email into the content field. Keep your message brief, but informative.
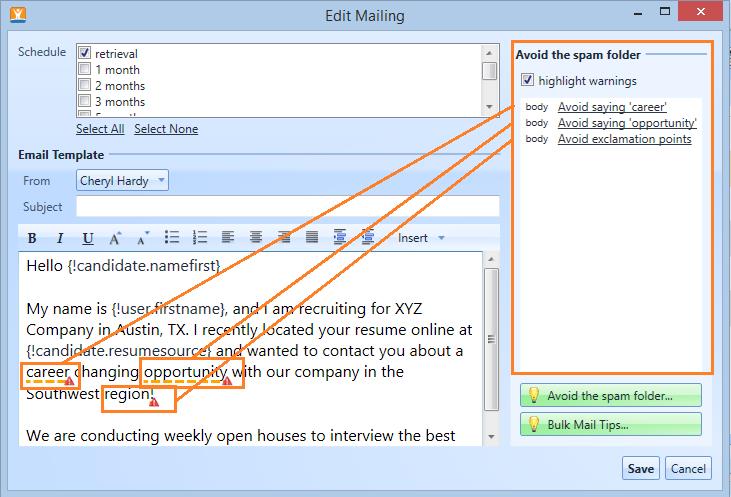
Note the macros in place to personalize the candidate’s name and other details. As we create content, the spam warnings populate to show us what language we should review. Follow the prompts and clean up content as you go to have little to no warning flags in your copy.
As you compose your email, try to add content that sells your opportunity. Content like:
• Recent awards or recognitions your office or branch has received
• Reasons why your company is a great move for an experienced professional
• Hyperlinks to a company web page designed to excite/inform candidates
Step Nine: Provide full contact information and a link to your business. Be sure to provide full contact information at the end of the email so the recipient can see you are a legitimate representative from your company and you are giving them multiple ways to contact you. The easiest way to do this is to place the macro for your email signature in where you would close out your message. Include a link to your company website as well, if you desire.
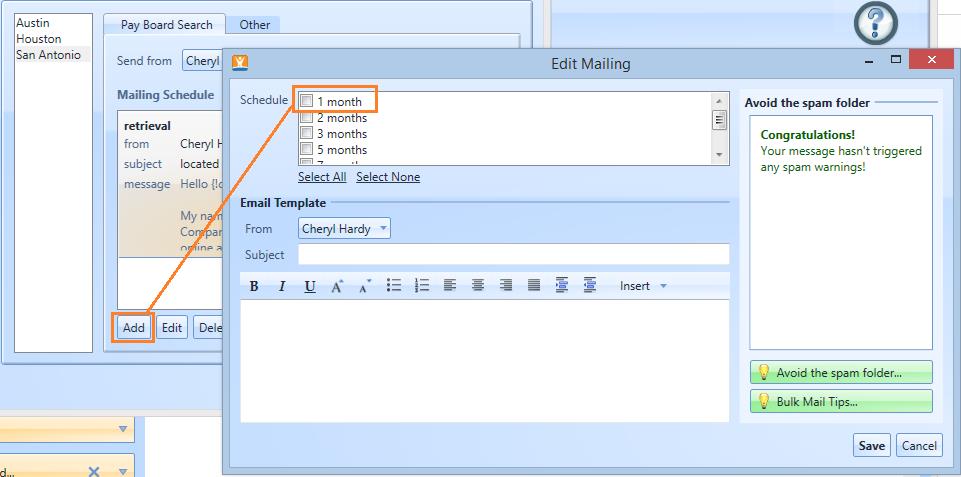
Step Ten: Once completed – click save and create the next email in the campaign series. When you have finished creating your retrieval email including subject line, body copy and signature, click “save” to preserve your edits. The next available email in your list is for month one. Click “add” from the bulk mail interface and click “1 month.”
Step Eleven: Repeat this process until you have an email for each contact point. Important notes: There will be eight emails in your mailing schedule list once you have completed this. Remember to make each email unique and to use content that informs the reader and makes them want to reply. Watch your spam triggers and be sure each email has a subject line and a signature.