Part One – Posting a Job
InsuraSeek now features Job Posting capability! Directly within your application, in addition to searching websites, candidate management and tracking, you can now post your jobs to popular premium career websites like Monster and CareerBuilder and more. Let’s walk you through posting a job.
Step One: Access the Job Posting Feature. The job posting utility is linked to your location entity in the organization tree. We’ve done this for two reasons: To help you distinguish your job listings when you create them, and to ensure your applicants are linked to the proper location folder as applicant resumes appear in your product. To access job postings, begin on your org tree, then click the location folder you want to link your job posting to. Then, click the job posting tab to the far right.
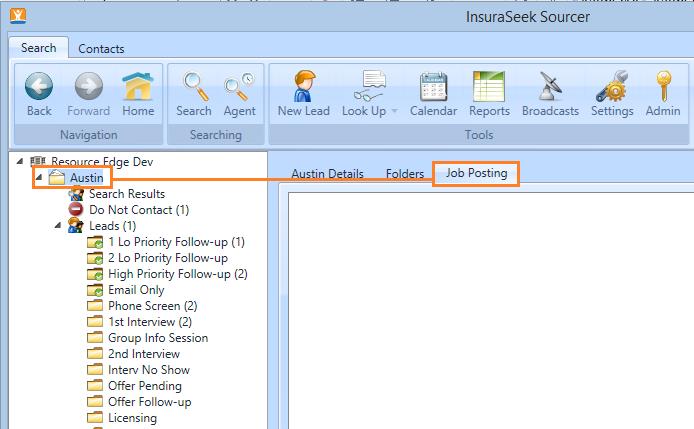
Step Two: Launch the job posting set up utility. On the job posting tab, you will note an “add” button on the bottom of the Job posting tab. Click this to launch the job posting utility.

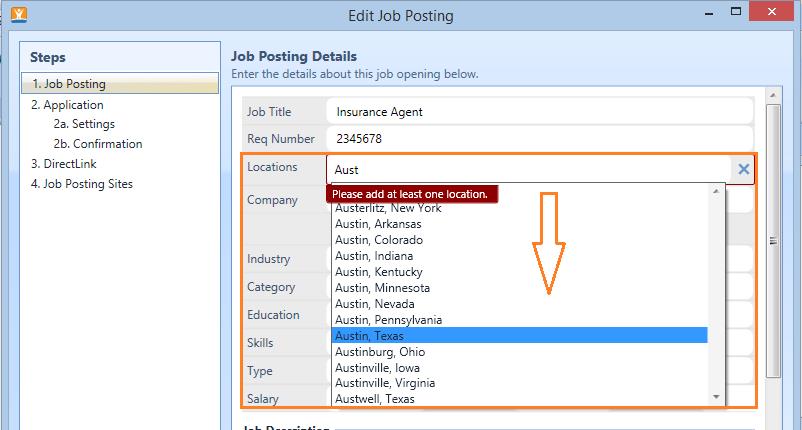
Step Three: Complete your job posting details. Next, you will begin providing details about your job posting. You’ll note the job title field has pulled directly from the name of the location folder. Change this to the “external job title” you would use when publishing job postings - the title you use for an external audience. If you’d like to associate a requisition number to the posted job description, you can plug that in where indicated.

For the location field, type in the first few letters of your city or zip code, and InsuraSeek will display a list of locations to choose from. You have the ability to list multiple locations if the job posting needs to cover more than one office or territory.
Select the Company Name by using the drop down to select your business name from a pre-existing list, or by manually typing the name of your company in the field. In the company description field, be sure to use marketing friendly, recruitment focused messaging here to attract candidates to learn more about your business and job opening.

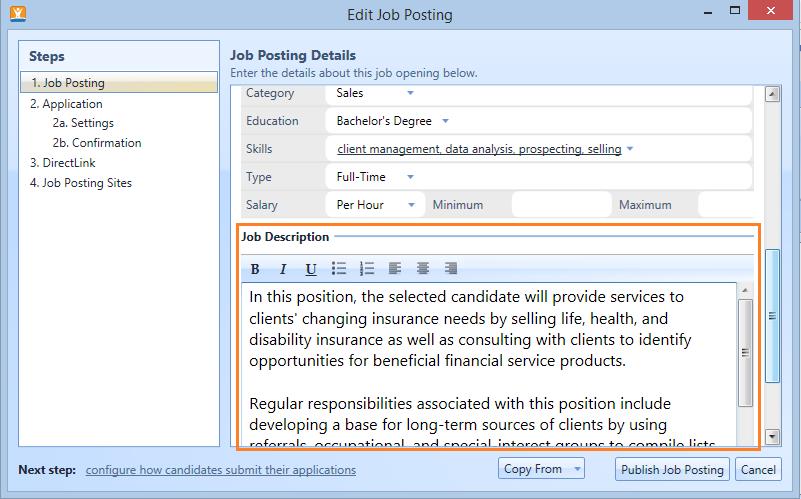
Next, complete the category and keyword fields that will be used to match the job posting website’s requirements. These are the same fields you would complete if you were filling out your posting on the website directly. Plug in any pertinent information to help sell your position and target the proper audience. For the skills section, the system will show you a library of previous skills you’ve used over time for job postings. If you need to add a skill to a posting, you can use the free field beneath the selected skills list, then click “add”.

Step Four: Create the public job description for the job posting. Using the html formatting toolbar to add any style changes to your text and create the content you want displayed for the job description. You may opt to cut and paste the description in here, or type it in manually.
Step Five: Configure how candidates submit their applications. When you reach the end of the job details section, you will note the “next step” hint at the bottom of the dialogue box. This also corresponds with the list show in the left hand portion of the window. Click either, to establish your application preferences.

You will note you have three application options. Review them carefully to determine which method works best for your existing process:
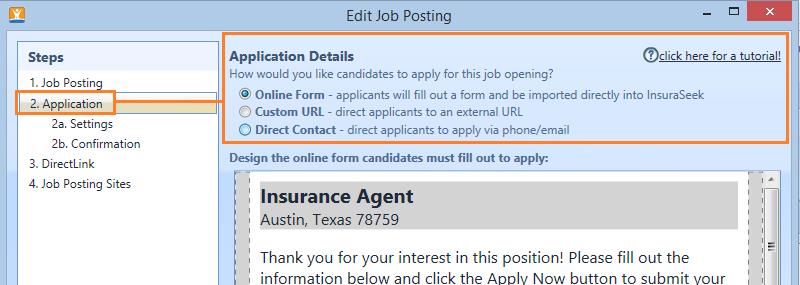
Online Forms: create your own online form where applicants fill out the fields you determine in order to submit their resume. This option is best if you’d like the resume to be imported automatically and ready to work directly within InsuraSeek the moment the applicant submits their interest.
Custom URL: this options works best if your existing business process requires you to direct applications to an existing career center website for processing.
Direct Contact: works best in scenarios where you want to recruit candidates that prefer emailing resumes, or you wish you pre-qualify them over the phone before importing a resume.
Select an option and the fields below will update to walk you through setting up the application method.
By selecting the first option, “Online Form” you can create on online application form where applicants can provide their contact information, upload a resume and submit their application. You can create or delete fields in this workspace. Each field can be formatted or removed to your preference – just hover over a section and you’ll see a text editor. To delete a field, select a text field and click the “x” in the upper right hand corner. To add a line of space, or additional field below the field you have selected, click the “+” on the left hand corner.

When you click the “+” button, a field chooser list will populate. To design a field for the form, you must first select the type of field you want inserted. For this example, we’ll build a paragraph field so we can create an intro message for our applicants.

When the field populates, we can type in the message we want displayed.

The Input fields allow you to plug in fields you would like the applicant to fill out when submitting their resume. These fields can be made required by clicking the check box beside the field type.

To format the layout of your page, consider using the header, image and line space field additions to give your application an appealing “headline”, brand identity (business logo) and professional appearance.

Use the Resume Input and Apply Now button, to provide a way for your applicants to upload their resume for consideration and complete their submission. The Apply Button will already be populated on your page by default. The resume input field allows applicants to cut and paste their resume into a field or upload a resume. The apply now button initiates the submission and directs the resume to your InsuraSeek application.

Carefully review your application page when you have it formatted to ensure you have all the necessary fields plugged in for a user-friendly submission form. Next, you will determine how you’re applications are processed. Again, click the next step link at the bottom left corner of the job posting window, or click Settings to proceed to the next step.
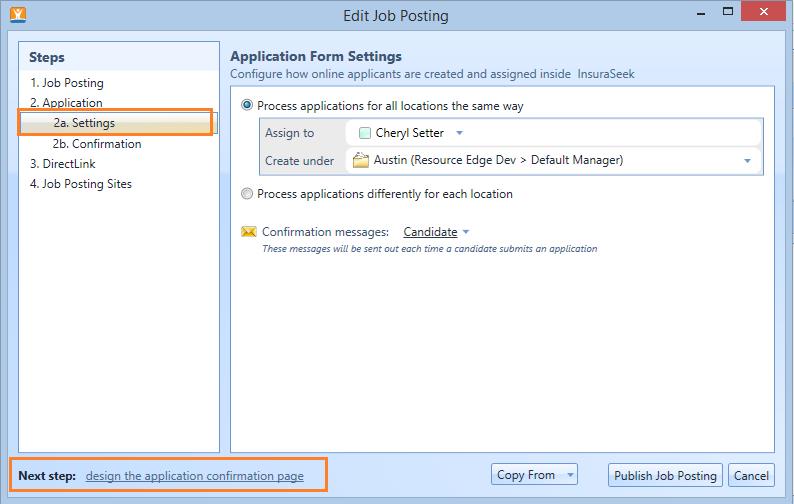
Step Six: Configure your application settings. In this section, you will determine where resumes coming into the application are routed, and set confirmation messages for the applicant. This is a recommended practice for a good candidate experience.

You can designate who you want resumes to be routed to as they come into the application. If your job posting is associated with more than one location, you can opt to “process applications differently for each location” to keep applicants separated according to the location the person is applying for. 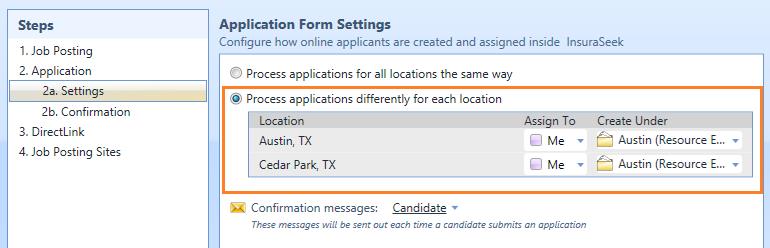
Beneath the application processing options, set your confirmation, just as you would when setting a candidate reminder during scheduling:

Your next step when you have completed these two actions will be to design the confirmation page your applicant will see once they have supplied their resume using your preferred method. To click that next step – use the “next step” link or click the “confirmation” link in the process tree on the left.
Please proceed to Part Two of this Help Topic to proceed to the next step – Setting your confirmation page.